
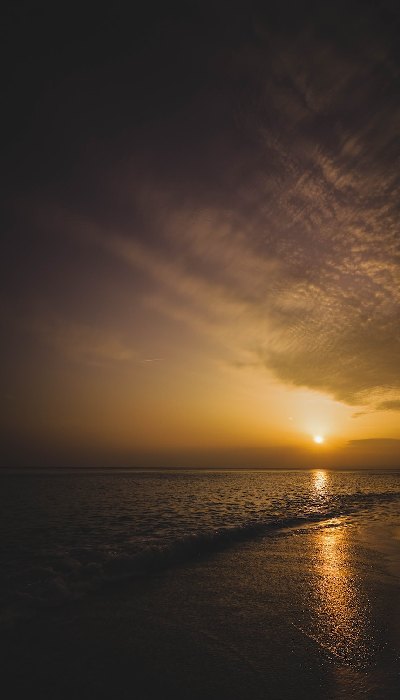
Sunset painting can be rewarding, but it’s also challenging because the colors of a sunset don’t last long, and you may have to sit around waiting to see the right color palette before you get the chance to capture it on canvas.
However, if you know where to stand and what you’re looking for, you can paint the sunset in your favorite spots with ease. Here are some tips on how to capture the magic of a sunset in a painting.

A Guide to Color Theory
In order to create an effective painting, you need to choose colors that fit together. To do so, you should know what color theory is, why it exists and how it works. In painting terms, color theory refers to three primary relationships: complementary (or opposing), split complementaries, and analogous (which describe harmonious combinations).
For example Red is complementary or opposite on your color wheel from green; blue-green and yellow-orange are split complements and blue, red, and yellow are analogous. Since any good painting will have an effective use of all three elements, let’s cover how each one works. The opposite pair will make a very vibrant painting with strong contrast.
The split complements pairs look great when used together because they provide variety without jarring changes—they keep each other in check by pulling some attention away from their partner. Analogous colors can be very warm and soothing, as they appear similar but never identical.
However, since we want to create contrast for interest, we want to try out our split complementary pair with an analogous combination instead of its direct complimenting pair. We can also make some changes for interest by mixing two tints or tones together for extra variation!
A Step-by-Step Process
When trying to capture a sunset in paint, use some of these tips for success. First, choose your medium. Acrylic paints are very popular because they dry quickly and offer good archival properties. If you’re looking for an organic look and feel, paint with oils or tempera. You may also want to try making your own paints from mineral pigments and binding agents like gum arabic. Next, sketch out your composition on paper before painting on canvas.
Once you have a clear idea of what you want to do, transfer it to your surface using graphite paper. Finally, start painting! Use lots of thin layers so that each layer dries completely before adding another one; otherwise, oil paints will never cure properly and acrylics won’t be as durable as they could be. Be sure to mix your colors well before applying them. You can also make custom tints by mixing complementary colors (blue + yellow = green).
The resulting color is somewhere between blue and green, depending on how much blue is mixed into the yellow. And lastly, if you’re working with the wet-into-wet technique, don’t worry about blending—just let nature take its course! This can result in subtle gradients instead of distinct bands of color—something often seen in nature.
Tips on Planning Your Artwork
If you want to create an artwork that captures, in paint, all of the light and color, and essence of a sunset, you’re going to need to make plans. While it might seem like capturing sunsets is more artistic expression than science—after all, no two sunsets look exactly alike—there are some simple steps you can take ahead of time (on paper) that will help ensure your artwork turns out exactly as planned.
First step: Draw up some sketches! Of course, not just any old sketch will do. You’ll need something similar to our example here. A few things to keep in mind when creating these drawings:
1) Don’t get too detailed with shading or colors;
2) Make sure your horizon line matches up with real life;
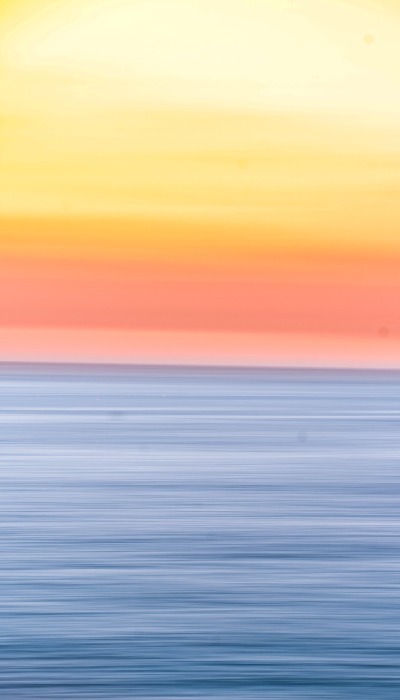
3) Don’t forget to add clouds. Clouds are key for painting sunsets because they give depth and texture. Think about it: if there were no clouds, would you even be able to tell what was sky vs. what was water? Without clouds, we’d have nothing but a flat blue rectangle sitting on top of another flat blue rectangle. Boring!
The Different Paints and Brushes You’ll Need
Before we get started, you’ll need an assortment of paints and brushes. If you don’t already have these, they can be purchased at any art supply store. You’ll also need some sort of easel or painting stand if you’re planning on working outside. If you’re planning on painting inside, grab some foam core or cardboard for your canvas stand.
It’s helpful to have a set palette with wells for all your colors and a white brush as well; something like that can be purchased at any art supply store as well. When choosing your paints, it’s best to stick with oil-based paint rather than water-based paint (though both will work). Oil-based paint is thicker and more opaque than water-based paint, making it ideal for capturing sunsets.
Also make sure you choose paints that are made specifically for painting outdoors – acrylics tend to dry up faster when exposed to sunlight. Most importantly: buy good quality supplies! Cheap brushes won’t hold enough paint and cheap paints won’t cover well – which means you’ll end up spending more money in the long run. Take care of your supplies so they last longer!
After you complete your artwork
When you’ve finished your painting, take some time away from it. Put it aside for 24 hours and then look at it again with fresh eyes. You may find that when you look at your artwork with fresh eyes, you spot mistakes or areas that need improvement. Go back into your painting and make any needed corrections to get rid of these flaws so that they don’t ruin your piece when you display it in front of others or sell it on Etsy or eBay.
Conclusion
This is an art we’re talking about, after all. Sure, you can run up and quickly put down colors onto your paper. But if you’re going to do it right—if you want to make something that will be remembered for years to come—you need to slow down and take care when choosing colors and layering them on top of each other.
Take some time away from your project every so often. Look at it from across your studio or with fresh eyes as soon as you wake up in the morning before anything else has had a chance to impact how you see it.
Also, check out the latest articles “Nail art designs” and “Paint on canvas“
Hi I’m Bilal Malik, a digital marketing and blogging expert holding years of experience.


